Define a Segment
Define a segment using a combination of target groups, to personalize a component.
Open the Content audiences application.
Open the Segments tab.

All segments already defined are listed on the left. The details of the selected segment are displayed on the right.
Click on Add segment in the bottom left corner. A new, empty segment is added:

Enter a name for the new segment, for example 'Nordic Student':

Optionally, enter a description.
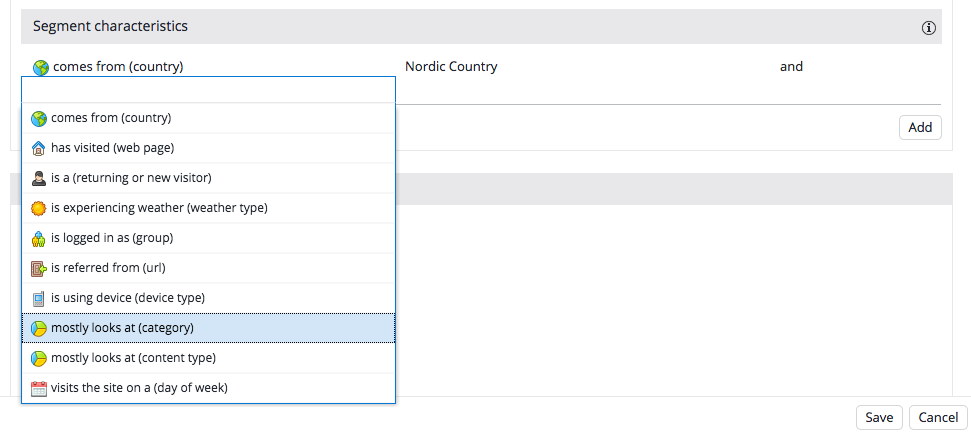
In Segment characteristics, click on Add.
In the left column, select a characteristic from the dropdown:

In the right column, select a target group from the dropdown:

Repeat until you have defined the desired combination of target groups.
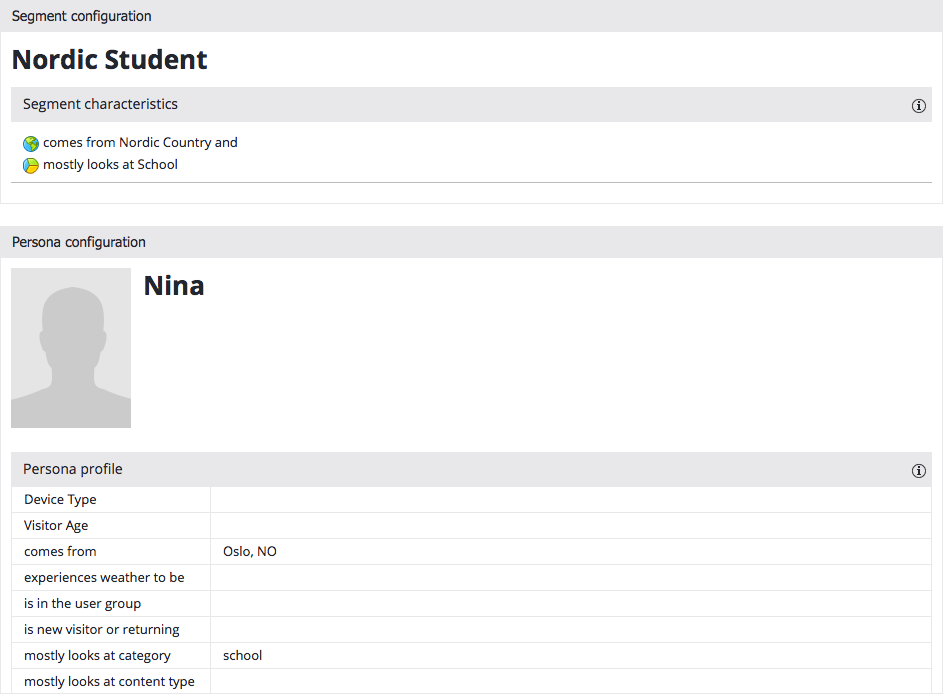
For example, for the segment 'Nordic Student' you could select the target groups 'comes from (country), Nordic Country' and 'mostly looks at (category), School'.
By default, a visitor must have all characteristics to be considered part of the segment. Optionally, select 'or' in the third column for any two characteristics. In that case, a visitor is considered part of the segment if they have at least one of the characteristics combined using 'or'. For example, 'comes from Nordic Country' or 'mostly looks at School'.

Visually, characteristics combined using 'or' are separated by a horizontal line.

Try to avoid unnecessary OR expressions in your segments, as these can cause performance issues. It's always better to use OR expressions within target groups as much as possible and use those target groups in your segment.
For example, do not define a segment as:
comes from Denmark OR comes from Norway OR comes from Sweden OR comes from Finland OR comes from Island OR mostly looks at School.
Instead, define a target group 'Nordic Countries' for the different values of the country characteristic:
comes from Denmark OR comes from Norway OR comes from Sweden OR comes from Finland OR comes from Island.
Then define your segment as:
comes from Nordic Country OR mostly looks at School.
Finally, define a Persona for the new segment. Although this is not required, it is highly recommended because it allows you to preview a personalized component for that segment in the Experience manager.
The persona profile should contain concrete values for the segment characteristics. For example, the persona 'Nina, the Nordic Student' comes from Oslo, Norway (an example someone who 'come from a Nordic Country'), and mostly looks at category 'school'.
Enter a name for the persona. For example, enter 'Nina'.
Optionally, upload a picture and enter a quote.
In Persona profile, select a property in the left column.
In the right column, enter or select a value.
For example, select 'comes from' in the left column and select 'Oslo, NO' in the right column.

Or select 'mostly looks at category' in the left column, and enter 'school' in the right column:

Click on Save in the top right to save the new segment.

You can now use this segment to personalize a component.

