Update brXM virtual hosts for the bloomreach.cloud domain
Introduction
Bloomreach Cloud is switching its default domain from onehippo.io to bloomreach.cloud. This switch requires a reconfiguration of Bloomreach Experience Manager's delivery tier (HST) virtual hosts.
The URLs that are being affected
Only the default URLs to the environments are affected. Example of such URLs:
https://prod-customer.onehippo.io
https://green-customer.onehippo.io
The URLs that are not affected
Any URLs that access the environment through a domain created in the Mission Control Domains page.
Procedure
The following steps show how to enable a Bloomreach Cloud environment to be accessible via the bloomreach.cloud domain. The procedure must be repeated for each environment.
1. Open Console
Open the environment in Mission Control and click on the CONSOLE button: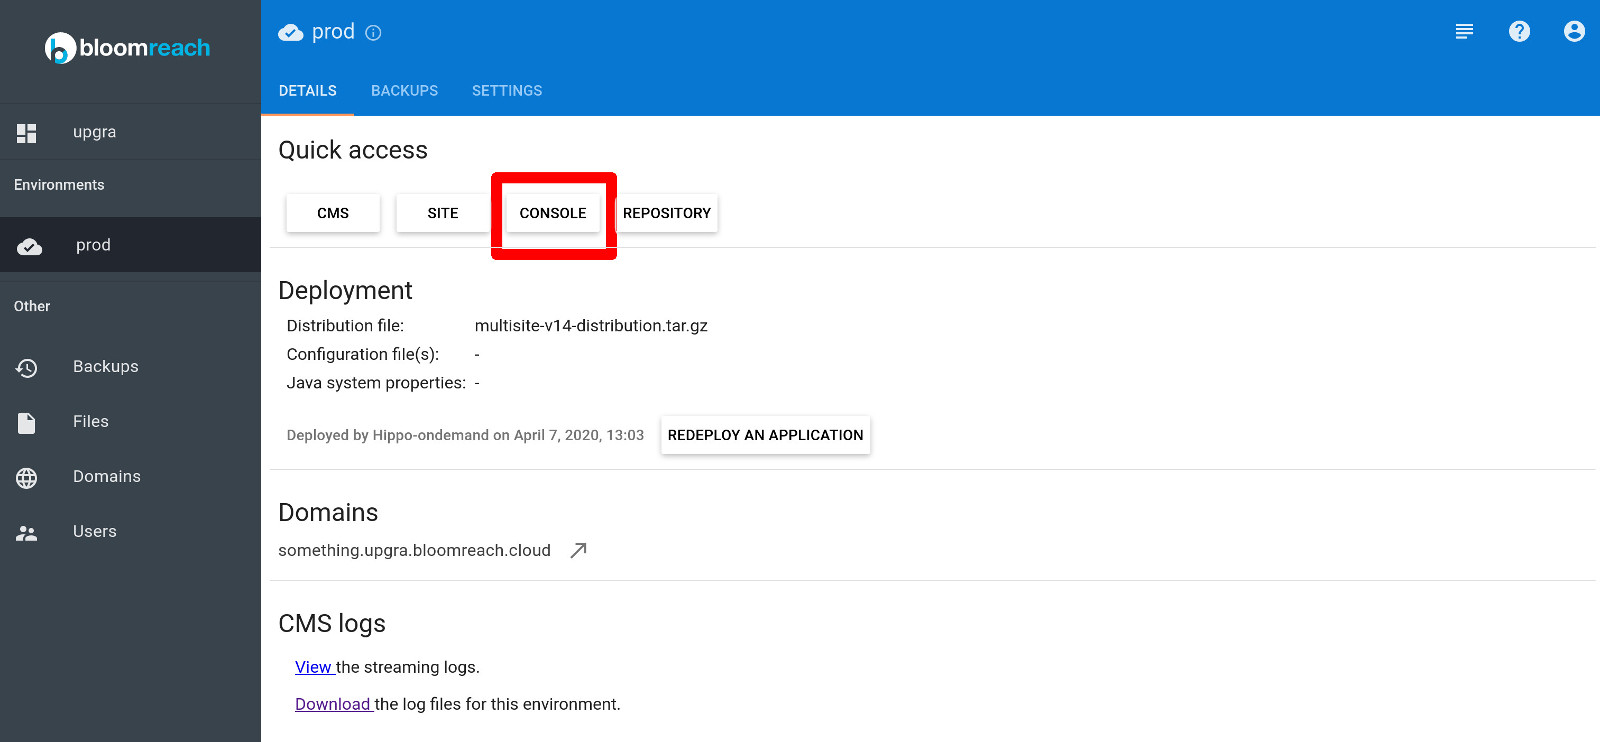
2. Locate the mainsite, hst:hosts, od2
Login into the console and navigate to /hst:mainsite/hst:hosts/od2. This node is the root node for all virtual hosts configuration. All operations will be applied under it.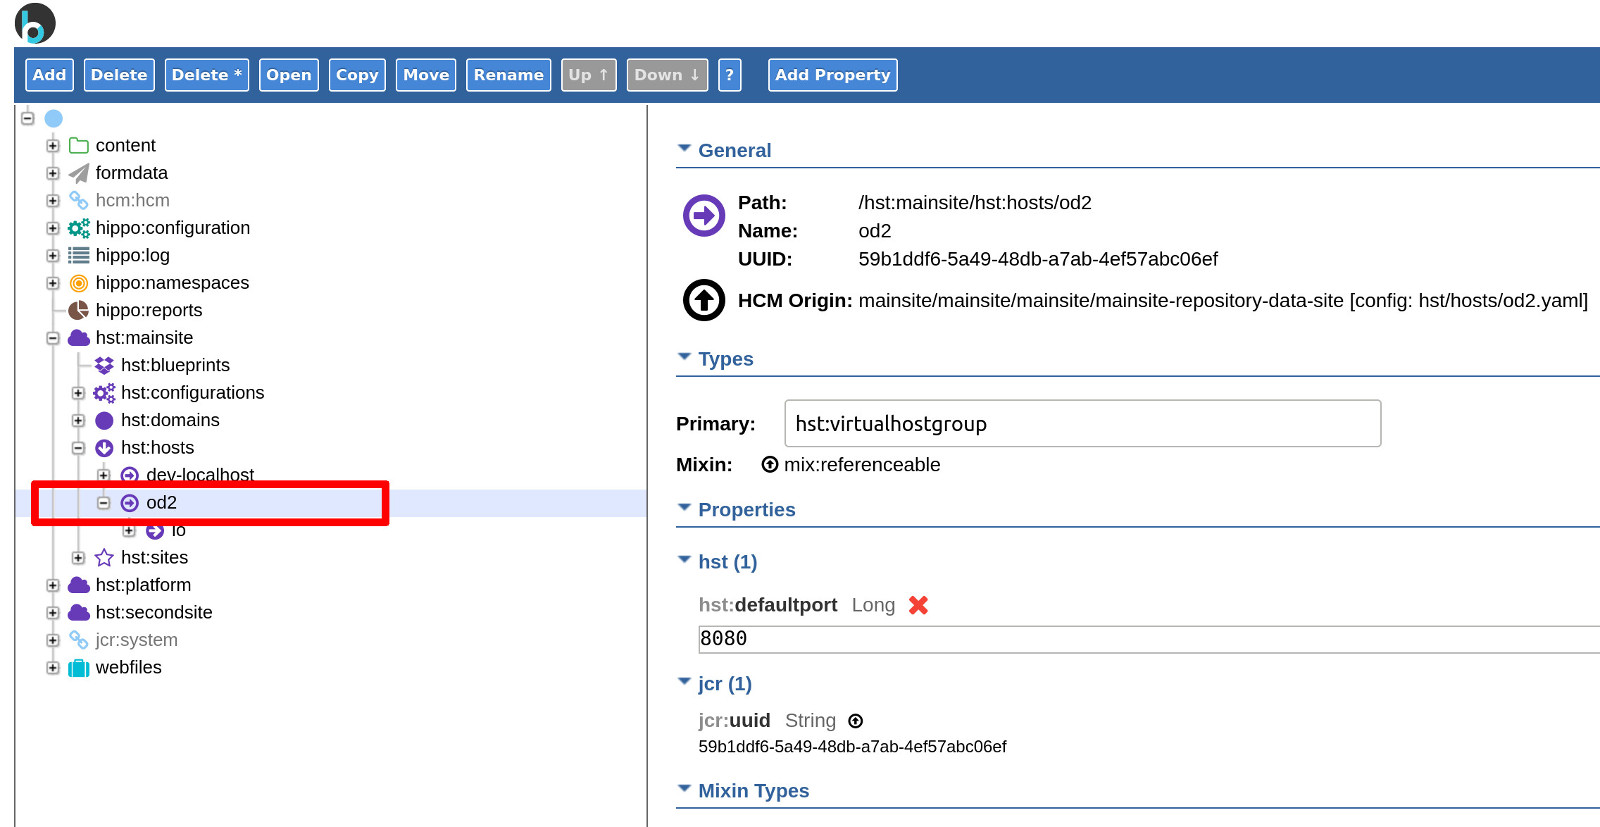
3. Explore the tree
Below the 'od2' node, there should be at least one subtree, which allows access to the site via the onehippo.io domain, in this case the URL is https://prod-upgra.onehippo.io. Each part of the URL corresponds to a separate node in the HST configuration: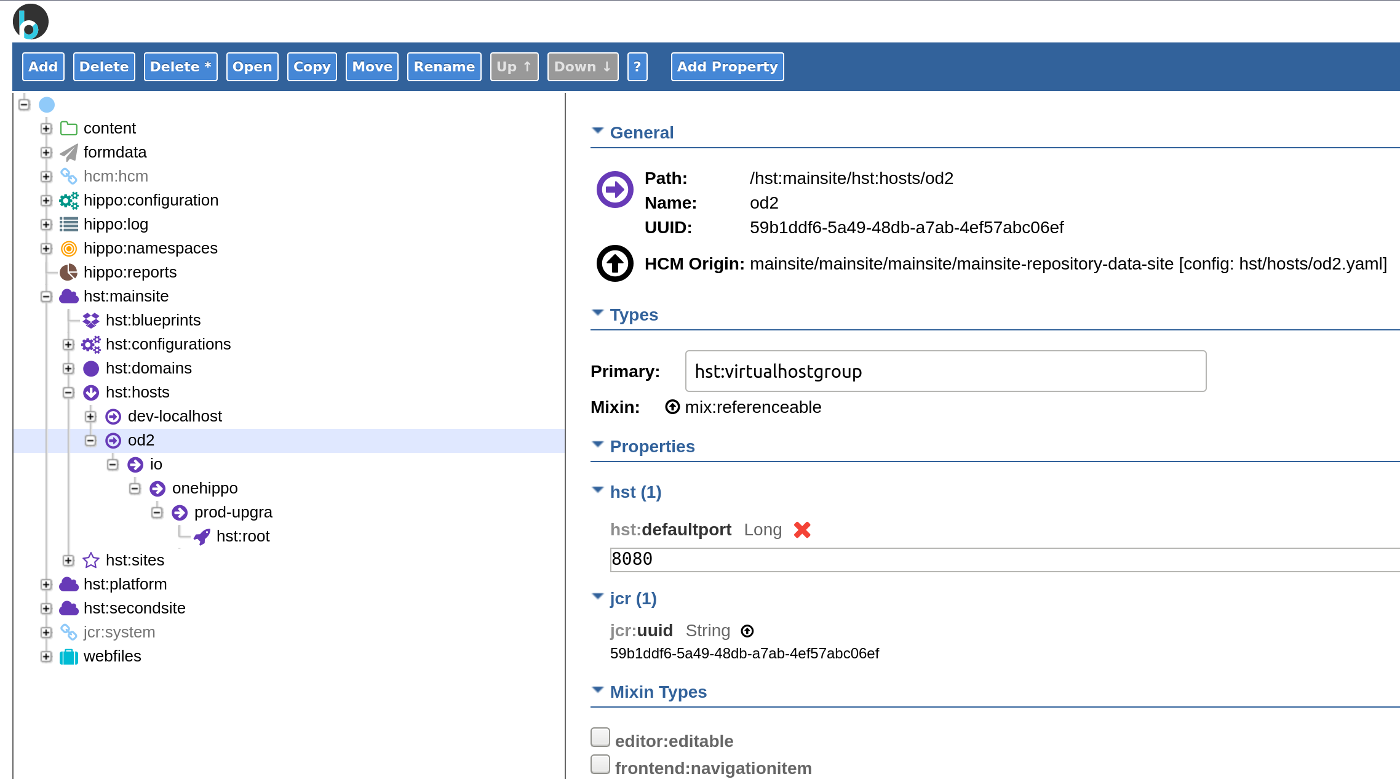
4. Copy
Right click the 'io' node and select Copy node:
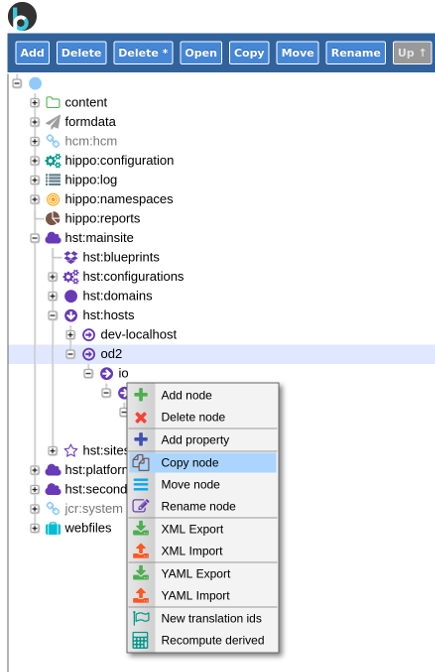
In the copy dialog that appears, set the name to "cloud":
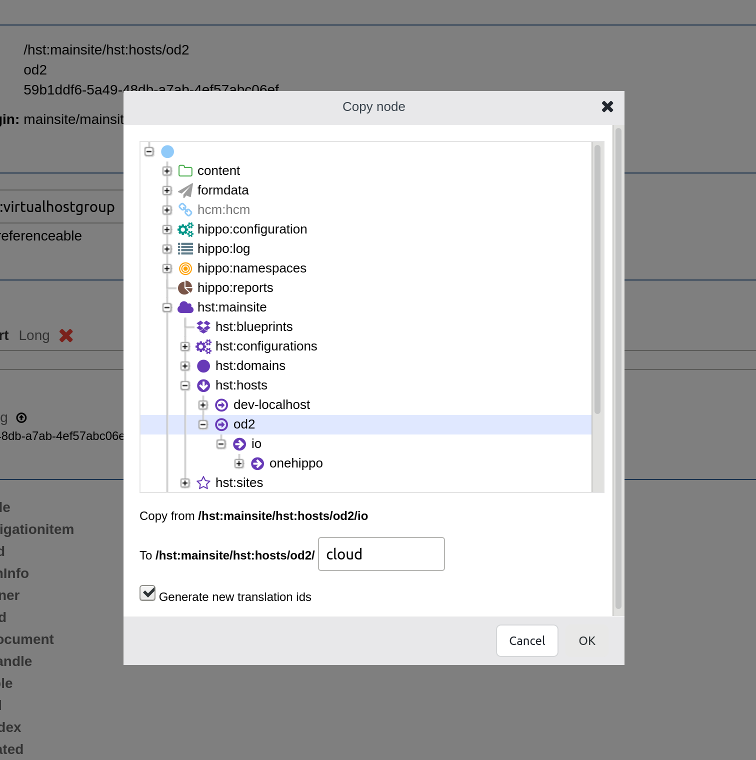
This will copy the whole 'io' hierarchy, the result should look like this:
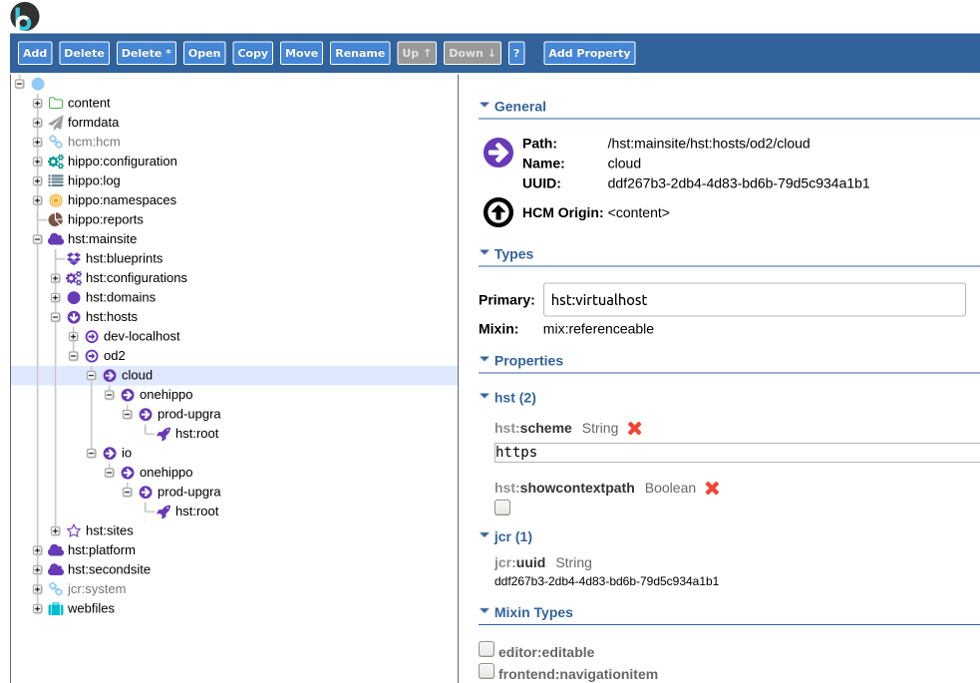
5. Rename 'onehippo' to 'bloomreach'
Right click the 'onehippo' node and select Rename node, in the input box enter "bloomreach" without the quotes.
6. Rename the prod-upgra to your stack name
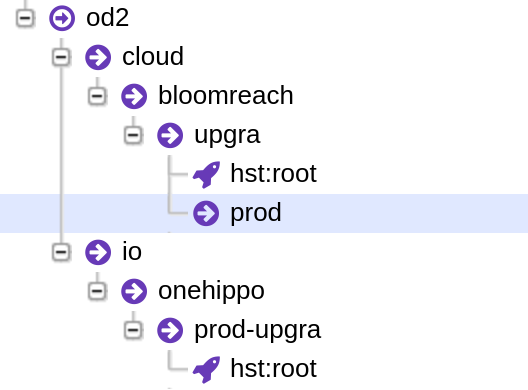
Right click the 'prod-upgra' node (or the corresponding node in your configuration) and rename it to your stack name. In this case, the stack is named 'upgra'. The end result should look like this:
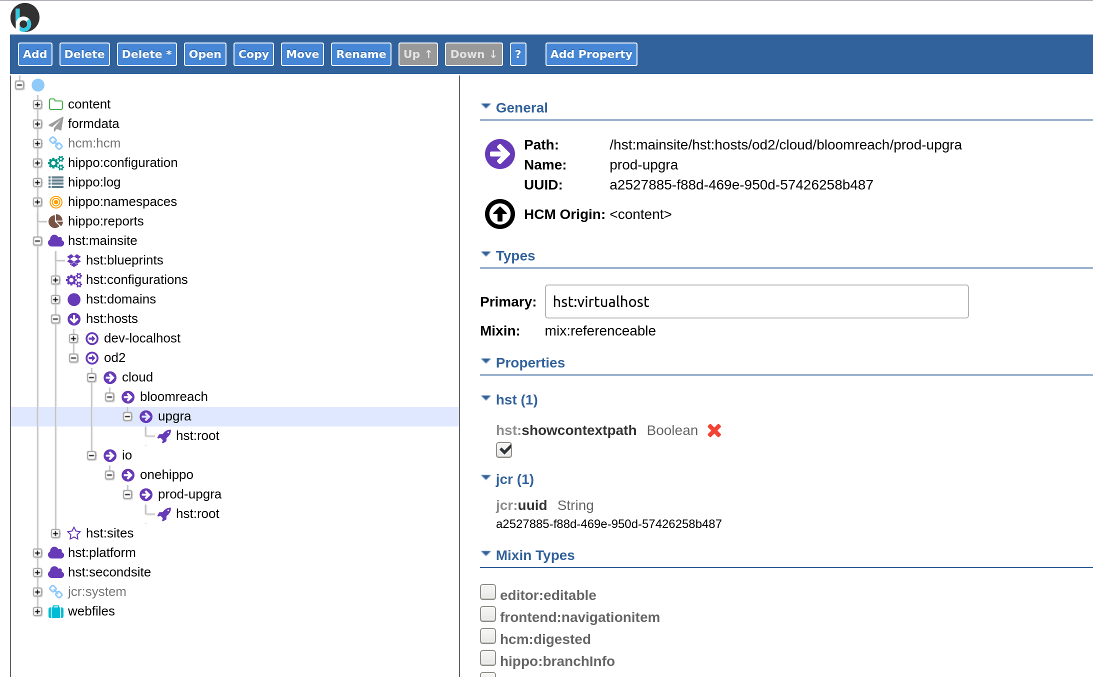
7. Create a new node 'prod'
Since the HST tree has to have one node per DNS domain - prod.upgra.bloomreach.cloud requires four nodes - 'cloud', 'bloomreach', 'upgra', 'prod'. We need to create the 'prod' node. Right click the node that represents the stack name and select Add node:
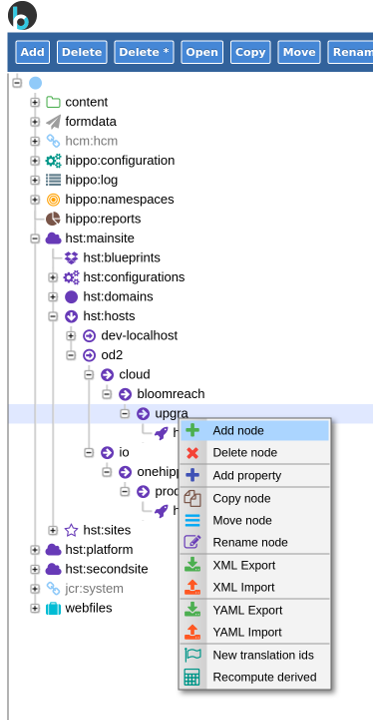
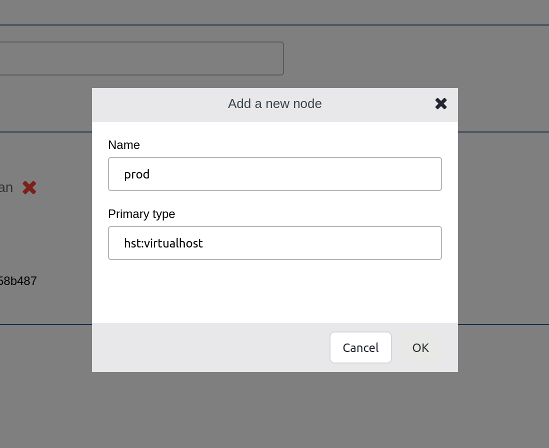
In the Name field, enter the name of your environment (in this case it’s "prod"), in the Primary type field enter "hst:virtualhost":
The end result should look like this:
8. Move the 'hst:root' node under the 'prod' node
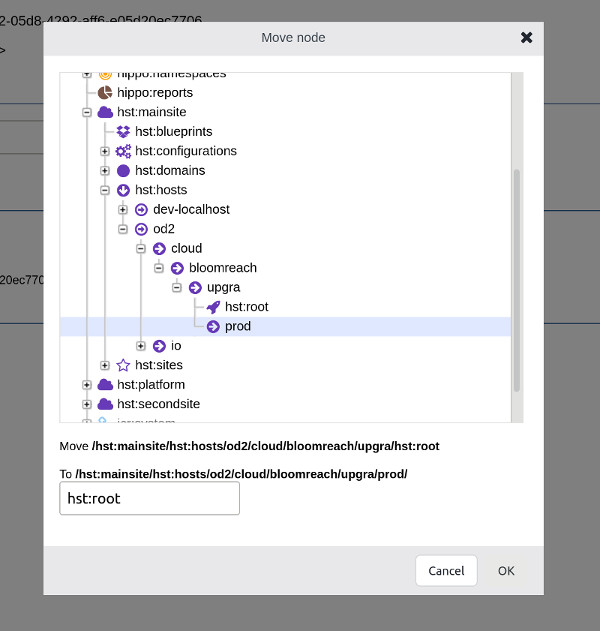
Right click the 'hst:root' node and select Move node. Select the previously created node with the environment name as a target:
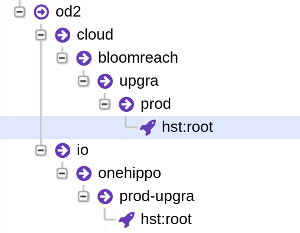
The end result should be like this:
9. Save changes
In the top-right corner click Write changes to repository to save the changes.
10. Access the environment
Access your environment via the following URL scheme:
https://ENV-NAME.STACK-NAME.bloomreach.cloud/site
In this particular case, it would be:
https://prod.upgra.bloomreach.cloud/site
You should see the site main page.
11. Making the Experience Manager work (optional)
If you're using the CMS via a default URL (such as onehippo.io), the Experience Manager requires all the steps from 1 to 10 be repeated, but this time inside of the /hst:platform/hst:hosts/od2 hierarchy. If you're accessing the CMS via a custom domain defined in Mission Control, no such steps are needed, it is expected for that configuration to be already in place.

